Minimizing the build size of your game is always a plus: it saves your disk space, it saves your time to upload and your players’ time to download, besides some app stores and shops impose size limits. So that’s one of the things which I was doing while porting our game to Nintendo Switch (it’s worth nothing that this optimization and improvement is applicable to other platforms as well).
So one day I clapped my eyes on a thing I saw like a couple of thousand times: a splash screen with logos of our company and our publisher. I recalled that I had to use a 2048x2048 texture with enabled mipmaps to make it look nice on various screen resolutions.
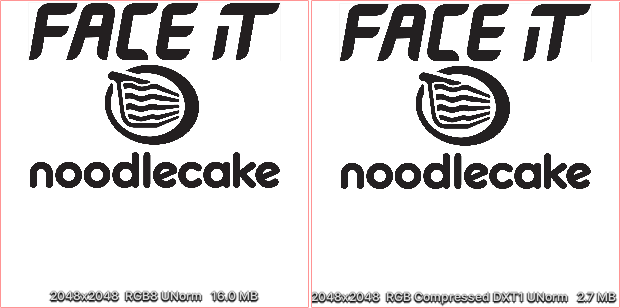
Original atlas without and with compression
As you can see in original RGB24 format (it has no alpha because I tried to optimize at that time already) it takes enormous 16MB of memory. And even using a compressed DXT1 format gives us 2.7MB (I guess using PVRTC for iOS and ETC for Android of the same quality has similar results).
One of my favourite questions is “Can I do better?”. Spoiler alert: yes. Such monochromatic images is a great opportunity to use signed distance fields (SDF for short).
The first mentioning of this technique I found in one of the Valve’s publucations in 2007. I have to admit I didn’t clearly understand how it worked exactly by I definitely was impressed by result.
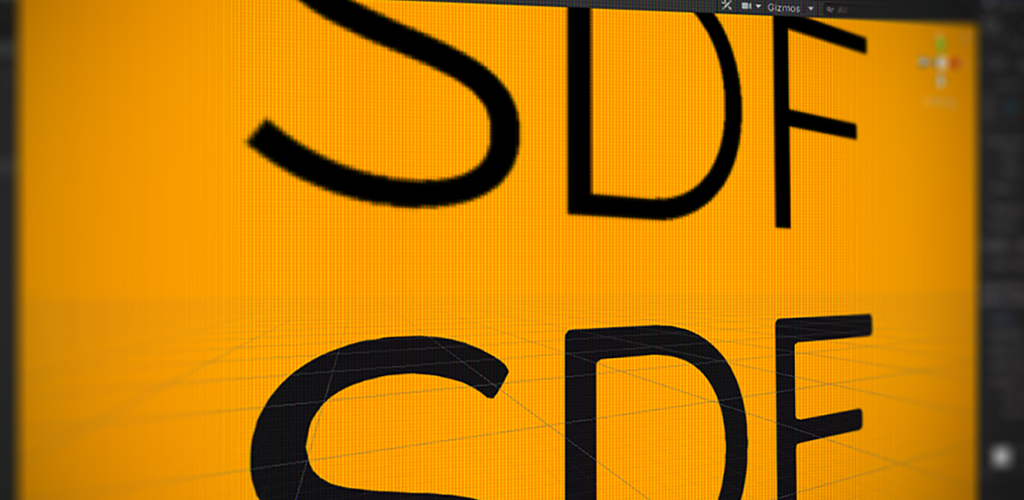
In a few words SDF encodes an information about the distance from the texel to the contour in both directions: inwards and outwards. Typically the value of 0.5 means zero distance from the contour, the value of 0 represents the maximum possible negative distance (fully inside) and the value of 1 represents the maximum possible positive distance (fully outside).

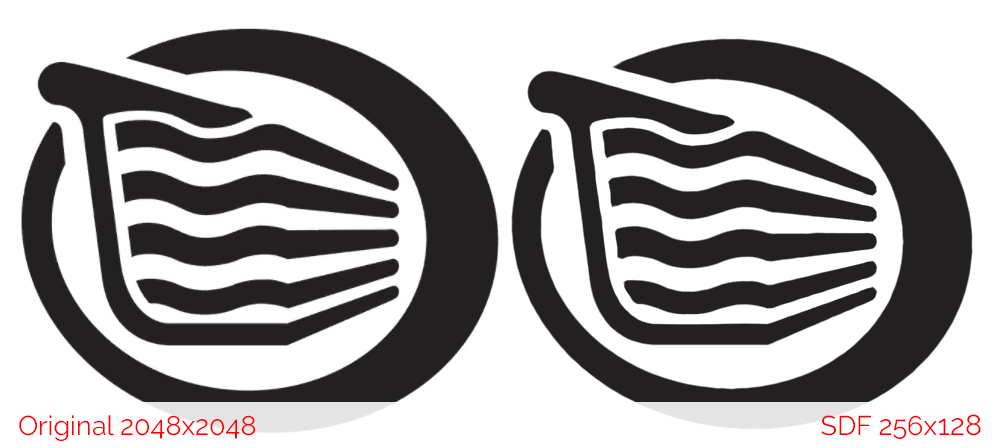
Example (original and SDF)
So how to convert an image into a signed distance field? Well there are plenty of ways and tools to do this, just use google.
Since I have an NPM installed I used this console tool. Additionally to generating distance field it can downsample the image.
Another way to create a SDF is to use Photoshop. You need to apply a ‘Stroke’ style with the following settings. The size of the stroke depends on the size of the image. Practise shows that it needs to be about 10% of the image size to give a nice result. Don’t forget to downsample the image. In my case the size of the image was reduced from 2048x2048 to 256x256, but in the publication Valve provides an example of the image downsampled from 4096x4096 to 64x64. Basically it depends on the details of the original image, which obviously could be vanished after downsampling.
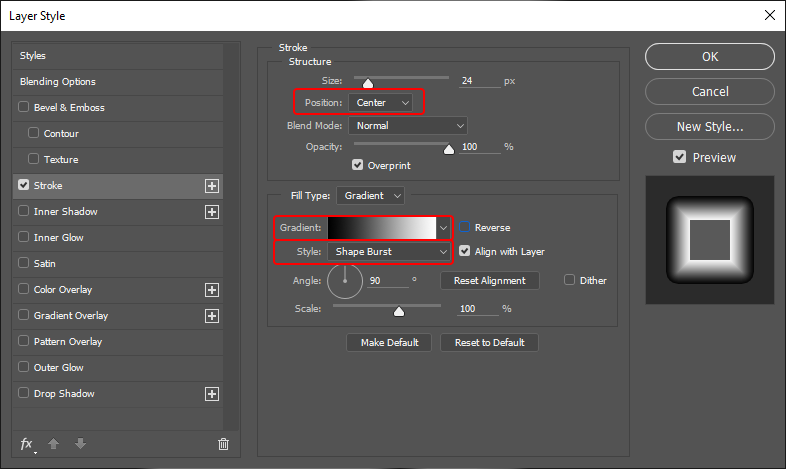
Creating SDF in Photoshop
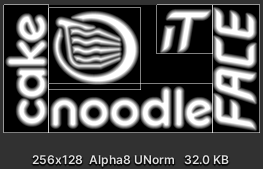
Now the image is ready to be imported in Unity. Pay attention that this technique requires filtering to be enabled. Also since we need only one channel we can ask Unity to convert our RGBA32 image into A8 and save lots of memory.
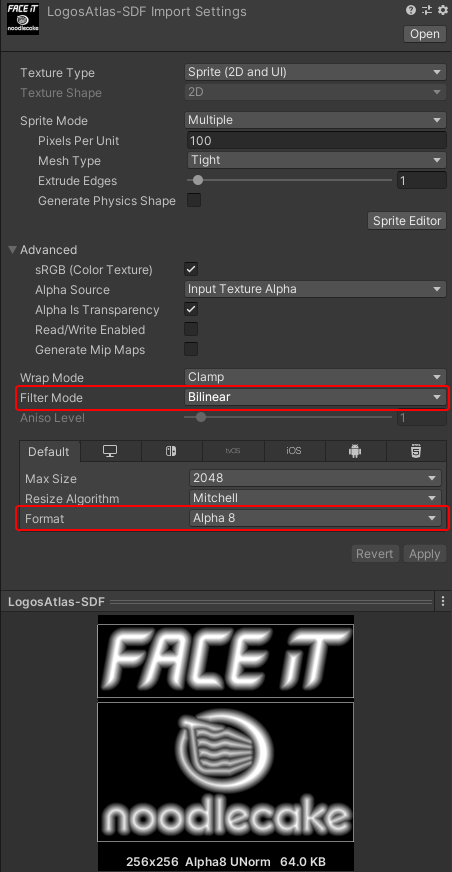
Unity import settings
The last but not least part of this technique is a shader. In my case I needed to use the image with UI, so I took a ‘UI Default’ built-in shader from Unity Archive and used it as a starting point.
At first lets add required properties and corresponding variables:
Next - use them in the fragment shader:
“Distance Contrast” and “Distance Threshold” properties work in a pair and represent how thick the contour will be. To get a good result the “contrast” should be about twice as large as the “threshold”. “Distance smoothness” defines how smooth or blurred the contour of the shape will be. Unlike other similar shaders across the Internet, mine provides resolution-independent smoothness of the contour: the width of the antialiased line stays the same for every screen size.
Full shader code can be found here.
Tight packing
Which gave me the following result (rendered at 3840x2560).
Comparison
I consider this as an excellent result:
- the build reduced in size from 495MB to 491MB (minus 4MB out of a thin air!);
- the video memory footprint reduced as well (although it wasn’t a bottleneck);
- the image stays crisp even on 4K resolution;
- I finally used SDF in a real battle :)